Tuesday, February 28, 2012

Turkey Wontons with Wasabi Mayo


We've been wanting to make wonton cups for a while. It all started with our Pumpkin Cups, and the idea of making tiny cups just took off. We actually made this for a food contest at Michelle's work. There were all kinds of prizes, like Healthiest Option, Tastiest Appetizer, and Most Attractive food. There were others (like best pie and best soup), but those were the three categories our appetizer fit into. We're proud to say we won the Best Healthy Dish category, and were a close second in best appetizer.  


So, we wanted to go healthy, but still pack a ton of flavor. And so, the turkey wonton cups were born.


Here's what you need:
Cups:
1 package wonton wrappers
Mini muffin pan


Filling:
1 lb. ground turkey
1 Tbsp plum sauce
2-3 scallions
1 ginger root, about 2"
low sodium soy sauce


Mayo:
Olive Oil Mayo
Wasabi powder or paste


Here's what you do:
Start by whipping together your wasabi mayo. Use 2-3 tablespoons of mayo for this. You won't need a ton, because you're just putting a small dollop on the top.


Add the wasabi powder (or paste) about 1/8 of a teaspoon at a time until you reach the flavor that you want. Keep in mind that it will intensify slightly over time, so don't go crazy right off the bat.


Pre-heat your oven to 350 degrees.


Spray your mini muffin pan with cooking spray, and press the wontons down into it. Fold the wontons over to make little cups. We know we took a picture of this, but it seems our camera lost it. Sorry.


Bake the wontons for 10-12 minutes, or until they are brown and crispy.


Now for the filling... 


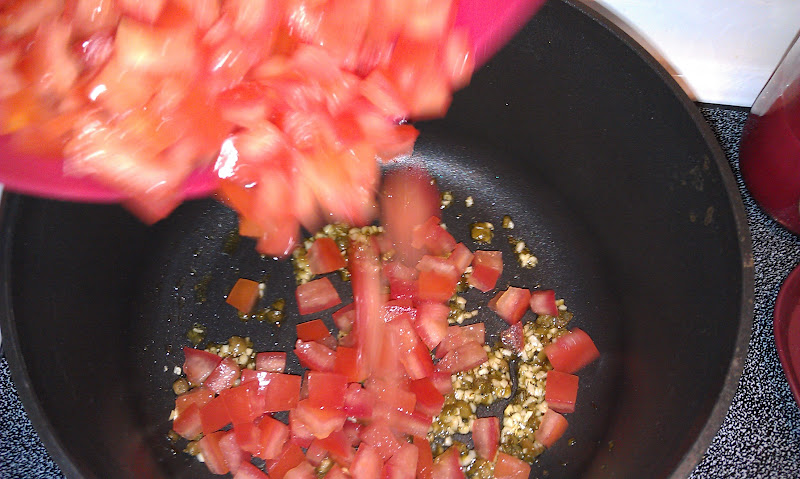
Slice the scallions.


Grate the ginger (or mince if you don't have a fancy ginger grater).


And mince your garlic.


Heat a 12" skillet over medium heat. Throw the turkey in and break apart with a wooden spoon, or a Mix 'n Chop.


Add the onion, ginger and garlic.


Next, pour the low-sodium soy over the turkey.


And then add the plum sauce.


Let that cook until the turkey is browned completely. 


Scoop a small amount of the filling into each cup, then top with a bit of the mayo. We garnished with a strip of green onion.


Enjoy!

Sunday, February 26, 2012

Roasted Carrots


These carrots were a perfect compliment to Zack's Baked Mahi Mahi and Rainbow Chard. They provided a sweet flavor and nice texture to the meal. Of course, you can make them with any meal as a nice, healthy side dish.


Here's what you need:
6-8 carrots (or more depending on your group)
Handful of parsley
2 Tbsp unsalted butter
Kosher salt
Freshly ground black pepper


Here's what you do:
Preheat your oven to 450.


Wash and peel your carrots.


Then, slice them on the bias.


Next, chop up your parsley and toss everything in a bowl. Drizzle with olive oil and toss it around to coat.


Put them in a 9 x 13 baking dish and pop them in the oven. Bake for about 25 minutes, or until the carrots are fork tender and crispy on the edges.


Enjoy!

Friday, February 24, 2012

Rainbow Chard


This wilted rainbow chard was part of Baked Mahi Mahi with Tomato Relish that Zack made - without any help from his loving wife. For some reason, we've never made cooked greens before. We will be utilizing this a lot in the future. They're so tasty!


We used rainbow chard because it's the only leafy green that our grocery store had besides red and green leaf lettuce. You can substitute Swiss chard, kale, mustard greens, etc.


Here's what you need:
1-2 bunches of rainbow chard 
2 shallots
1 cup chicken stock (or vegetable stock if you're cooking vegetarian)


Here's what you do:
Coat the bottom of a pan with about a tablespoon of extra virgin olive oil. Place over medium heat.


Meanwhile, dice up the shallots.


Once your oil is hot, add the shallots to the pan.


Let those sweat until they are translucent. 


While your onions are sweating it out, remove the ribs of your greens. (Don't forget to wash them too).


Once the onions are ready, add the greens to the pot.


Let that all wilt and cook down.


Add the chicken stock once they've wilted by half.


And then let it cook down some more. When you achieve this state, you're ready to eat.


Enjoy!

Wednesday, February 22, 2012

Baked Mahi Mahi with Tomato Relish


Zack made this entire meal by himself. Michelle was allowed to take pictures, but after a while, it drove her crazy not being able to help and abandoned the picture taking and went to a different area of the house. This was, however, quite possibly the most delicious piece of fish we've ever cooked (and by we, we mean Zack).


The entire meal was Baked Mahi Mahi with Tomato "Relish" over a bed of rainbow chard with baked carrots. We're going to split the chard and carrots into separate blogs. It would be a little cumbersome to put it all into one post.

Here's what you need:
For the Fish:
2 Mahi Mahi steaks
2 Tbsp Unsalted butter
1 cup White wine
Salt & pepper

For the "relish":
4 vine tomatoes
2 cloves garlic
1 Tbsp capers
1/2 lemon zest
1/2 lemon juice
salt & pepper


Here's what you do:
Start the relish by mincing up the garlic.


Quickly run a knife through the capers.


Seed and dicing the tomatoes.


In a medium sauce pan, add about a 1/2 tablespoon of olive oil, and then the garlic and capers.


Let the capers and garlic cook for just a minute or two, then add the tomato.


Give everything a good stir and let it cook down.


Season with salt and pepper as needed.


At the very end, season with the zest of half a lemon and lemon juice. Taste to see if it needs more seasoning.


For the fish, preheat your oven to 350 degrees.


Place the fillets in a glass baking dish and season with salt and pepper.


Melt 2 tablespoons of butter.


Add the white wine to the measuring cup.


Pour that into the baking dish..


Bake for 20-30 minutes, or until fish is flaky and still juicy.


Rainbow chard recipe and carrot recipe coming soon!


Enjoy!

Monday, February 20, 2012

Pumpkin Pie Cups


We don't typically keep a lot of dessert-y type food in our house. If it was there constantly, we'd eat it... and weigh a tad more than we would like. So, the other night when Zack wanted something sweet after dinner, I was hard pressed to find something to make.


Being the pumpkin fanatic that I am, I always keep a can of pumpkin puree on hand. I also, miraculously had a pre-made pie crust or two laying around. The recipe is a bit like our Pumpkin Pie recipe, but altered based off the ingredients we had at our house.


Here's what you need:
1 15 oz. can of pumpkin puree
1/2 can sweetened condensed milk (I told you, I had to work with what I had on hand)
1/2 tsp salt
1 tsp cinnamon
1/2 tsp ground ginger
1/2 tsp ground nutmeg
2 eggs
crystallized ginger
Pre-made pie crust


Here's what you do:
Preheat your oven to 375 degrees.


Start by rolling your pie crust out so that it's about 1/8" thick. Using a biscuit cutter, cut rounds out of the pie crust. You'll have to eventually ball the crust back up and roll it out again. You can get about 24 rounds out of one pie crust. The filling, however, makes enough for at least 48 cups.


Once you have your rounds, start mixing up your filling.


Scoop the pumpkin into the bowl, and add spices and eggs to the bowl.


Give that a good stir.


Slowly add the sweetened condensed milk. Since we were using sweetened condensed milk instead of evaporated milk, we didn't add the sugar that we normally would for pumpkin pie.


Once you have a nice consistency, set the mixture aside, and prep your mini muffin tin.


Butter and flour the mini muffin tin. Trust me, you really want to remember this step. Otherwise, getting the pie cups out later will be a disaster.


Take your little pie crust rounds and form them into the pan.


Next, just spoon in some of the filling into each cup. Don't be like me, and try to actually keep the filling inside the cups. Your oven should be preheated by now, so pop the pan in for about 10 minutes.


After 10 minutes, pull them out of the oven and top with the crystallized ginger.


Return to the oven for another 10-15 minutes, or until the filling has puffed up and the crusts are browned.


Removing the cups from the pan was a challenge I hadn't anticipated when I first conceived of this dessert. What I ended up doing (thanks to Zack's quick rummaging through our kitchen drawers), was use my orange peeler to push down on one side of the crust, and then scoop it onto a spatula. You could probably use a butter knife in place of the pointy orange peeler. This is why buttering and flouring the pan is so important. They popped right out of the pan. 


Set them on a rack to cool for just a couple of minutes.


Sprinkle just a touch of cinnamon and sugar over the top right before you serve them.


Enjoy!